Vegan Mac n Cheese

DSC_0492.JPG

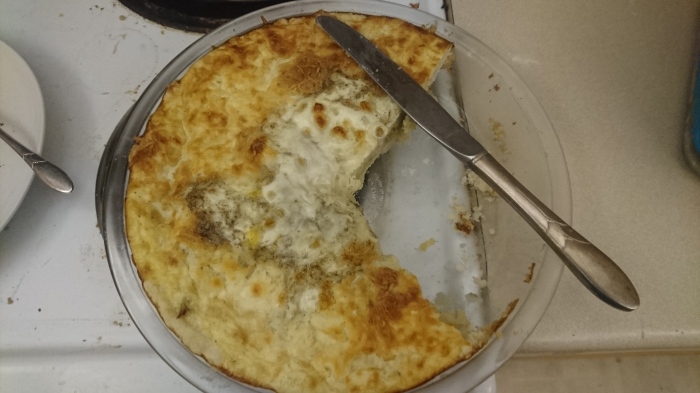
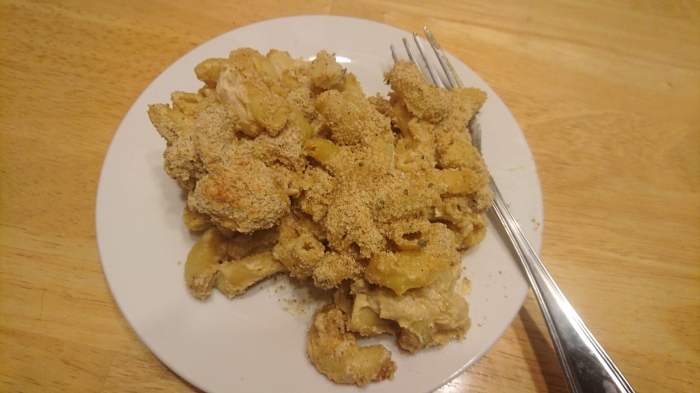
If you’re looking for something that tastes like regular mac n cheese but doesn’t have any actual cheese, you might want to keep looking, but if you just want an animal-free comfort food, this is a good option. Fresh from the oven, it had a strong taste of nutritional yeast, but the leftovers struck me more as macaroni with nut butter.

I made this a baked mac n cheese, topped with bread crumbs, but I’m not sure that added anything over just mix and serve, beside giving me an excuse to add tasty bread crumbs. Which didn’t brown until I turned the broiler on. And then they browned in a pattern that I assume matches the pattern of the oven’s heating element.

The recipe I was following suggested that if you don’t have a high-powered blender, you attack the cashews first, and then once the mixture was smooth, add everything else. I found that after a certain point, the cashews stopped getting any more chopped, but once I added the water, suddenly it made progress again, so I’d recommend just throwing everything in the blender from the getgo.


Ingredients
  • cups raw cashews
  • T . fresh lemon juice
  • 1 1/2 cup water
  • tsp  sea salt
  • 1/2 cup nutritional yeast
  • 1 tsp chili powder
  • 1 clove garlic
  • pinch of turmeric
  • pinch of cayenne pepper
  • 1 tsp mustard (dijon or yellow)
  • 16 oz of elbow or shell pasta of choice
  • bread crumbs
  • *optional add-ins: roasted broccoli, sauteed mushrooms, spinach (I didn’t add any of these, but the original author speaks highly of roasted broccoli
Instructions
  1. Preheat the oven to 350F. (If you are adding roasted broccoli to your dish, this would be a good time to start preparing that, so it can roast in the oven while you work on the rest!)
  2. Cook the pasta according the directions
  3. Throw the first ten ingredients into the blender, and blend until smooth and creamy.
  4. Once the pasta is cooked to your liking, drain and rinse it, then return the pasta to the pot to be mixed with the cheese sauce.
  5. If you’re adding any roasted or sauteed veggies, this would be the time to do it.
  6. Serve immediately while hot, or move on to the next step for baking.
Baking Instructions: (optional)
  1. Once you’ve mixed everything together, pour the mac n’ cheese into an 9 x 13 dish and top with bread crumbs. Bake at 350F for 20 minutes.
  2. Stick under the broiler for just long enough to brown the bread crumbs
  3. Let cool for about 5 minutes, then serve!

Source: https://detoxinista.com/move-over-kraft/

Pizza Bites

DSC_0429.JPG

This is the kind of thing one comes up with when one is trying to clean out one’s freezer/fridge. But I think it turned out well enough to share. It’s more of a concept than a recipe, but whatever. I think if you were making this just ‘cuz, pizza sauce might make more sense than peanut sauce – it’s got a less concentrated flavor and less runny consistency, and therefore is more conducive to covering the rest of the toppings with as much as you can without it overflowing. And also, blue cheese and peanut sauce aren’t necessarily a combo one would choose if one was considering which things go together.

  1. Preheat oven based on your package of dinner rolls (300* F for the ones I used).
  2. Remove from a package of dinner rolls however many you want to prepare.
  3. Stick your fingers in the middle of each to make a good sized hole.
  4. Stick a piece of veggie pepperoni each hole.
  5. Fill the rest of the hole with blue cheese.
  6. Pour peanut sauce over the innards.
  7. Top with shredded cheese (I used a pizzeria blend).
  8. Stick in the oven for however long the rolls request (5 minutes, in my case).
  9. Enjoy.

Lemon Cloud Pie

IMG_1946

Pi Day was not long ago. Of the pies they had at work, lemon cloud was the one that sounded the tastiest, but that one wasn’t vegetarian, so I had to go with something else. And then I made my own when I got home.

Which turned out to be a good decision. This pie turned out very tasty. And also super easy. Lots of lemon flavor, a not quite melt in your mouth texture, and a crust to make it much less messy than pudding, which is almost what the filling is.

I decided to use Extra Creamy Cool Whip to make sure it had the light fluffy texture that I was imagining, but I think next time I might go with regular – if anything, I’d like it have a little more substance.

  • 1 prepared 9-inch (6 oz.) graham cracker crust
  • 1 can (14 oz.) Sweetened Condensed Milk
  • 1/2 cup (about 3 medium lemons) fresh lemon juice
  • 1 teaspoon grated lemon peel
  • 2 cups frozen whipped topping, thawed
  • Grated lemon peel or lemon slices (optional)

Beat sweetened condensed milk, lemon juice and peel in small mixer bowl until combined. Fold in whipped topping; pour into crust. Cover; refrigerate for 2 hours or until set. Garnish with lemon peel.

Source: https://www.verybestbaking.com/recipes/134716/no-bake-lemon-cloud-pie

Lasagna

IMG_1943.JPG

I’m not sure this is a particularly bowl-you-over recipe, but it’s tasty enough, and super simple, which is generally good enough for me.

One observation is that the lasagna has a rather tough top crust. I’m wondering if adding an extra layer of noodles just below the mass of cheese on top was a bad idea. Noodles are already the part most in need of cutting, and adding a solid mass of cheese on top of them is, in hindsight, a questionable decision. Plus, letting the cheese melt into the other layers would make said cheese less of a solid mass and more of just a bubbly topping

The order of the layers doesn’t really matter. Obviously try to mix things up, but it doesn’t really matter. I don’t know if what’s listed there is actually the order I put everything in this time, but it sounds like a good idea.

I might go with more sauce – the original recipe calls for 36 oz – but all the jars I saw at the store were either 24 or 48, and I didn’t want any left over.

Some notes on quantities of items – I used less than an entire package of noodles because a smaller amount seemed to adequately cover the pan three times. Similarly, the quantity of pepperoni is really just enough to make a nice full layer. Given the brand and spacing I used, that took 24 pieces.

  1. In a large bowl, combine cottage cheese, sour cream. Stir in dried parsley to taste.
  2. Layer in a 9×13 pan: 1/2 of the sauce, 1/3 of the uncooked noodles, 1/2 of the cottage cheese mixture, 1 sausage (crumbled), 1/2 of the mozzarella cheese, 1/3 of the uncooked noodles, all the pepperoni, 1/2 of the sauce, 1/2 of the cottage cheese mixture, 1 sausage (crumbled), 1/3 of the noodles, 1/2 of the mozzarella cheese.
  3. Pour water around the outside edge of pan. Cover tightly with aluminum foil.
  4. Bake in a preheated 350 degree F (175 degree C) oven for one hour. Uncover. Continue baking for an additional 20 minutes, or until bubbly and browned. Remove from oven, and let stand 15 to 20 minutes before serving.

Based on: http://allrecipes.com/recipe/12006/lazy-lasagna-i/

Mini Sausage Quiche

IMG_1942.JPG

This one was largely my own creation. Sure I mostly followed a recipe for the crust, but what went into it was purely me making things up as I went along.

Regarding mixing up the crust, I wound up adding some extra water, but I also realized after I had added the initial 1/4 cup that I only had half as much butter as I needed (1 stick != 1 cup). Adding the water after ALL the butter was included might have made it come together better once everything off the ingredient list was finally in the bowl.

The other deviation I did was dividing the crust mixture into 12 roughly equal balls instead of rolling it out after seeing a different recipe use that approach. I’m not sure I would do that again based on how rough that equality turned out to be. Though on the other hand, there’s no dough left over that way. Though given my level of skill with a rolling pin, the last couple might need to be done by hand after the first batch are thicker than they ought to be. And/or I get tired of rolling the dough out and decide to just mash the dough against the sides of the tin and call it good.

Actually, I guess there’s a third thing – after seeing another site talking about the philosophy of mini pies say to grease the pan well, I didn’t quite trust this one’s saying it was unnecessary, so I gave the pan a good spray with cooking spray (instead of the oil + paper towel treatment I had originally been planning). The quiches came out of the pan very easily so maybe next time I’ll take the plunge and see if greasing the pan is actually unnecessary.

After that, it’s fairly straight forward – mixing things together and sticking things in the muffin tins. Though I did discover that I need some remedial training in egg beating. Large chunks of egg white don’t exactly make for easy transfer to muffin tins.

My initial impression of the finished produce is of sausage and crust, but that’s not necessarily a bad thing. I might like to be able to taste the Parmesan, but really the other ingredients are just there to hold things together and make it look more like a unified item. I think it could use some more egg/filling to fill in the crust better, but I’m not sure whether using large instead of medium eggs would handle that or if it would be better to up the number also. Or I could do like the broccoli quiche recipe does and include milk along with the egg.

  • 2 cups flour
  • 10 tablespoons butter (chilled)
  • 1 teaspoon salt
  • 4 tablespoons water
  • 2 Field Roast Italian sausage or similar (~ 6.5 oz total)
  • ~2.5 oz shredded Parmesan
  • 3 eggs
  • 2 tablespoons melted butter
  • 1/2 tsp pepper
  • dash salt
  1. Preheat oven to 425 degrees. Get muffin pan out. No need to grease it.
  2. Attack flour, salt and butter with a pastry cutter until it looks like little peas.
  3. Add in water and combine just until it looks like it’s sticking.
  4. Combine it by hand until well blended.
  5. Roll out on lightly floured surface until about 1/4 inch thick.
  6. Cut 12, 4 inch circles with cup or bowl. (You will need to roll out twice.)
  7. Press each circle in muffin tins until all the way up each side, to form little bowls.
  8. Divide sausage evenly between the cups
  9. Top with what looks like a reasonable amount of cheese
  10. Combine the eggs, butter, salt, and pepper.
  11. Pour over the tops of the quiches. (Using a spoon instead of trying to pour out of a bowl makes this easier.)
  12. Bake for 10-15 minutes
  13. Remove from pan promptly

Source (crust): http://www.food.com/recipe/mini-apple-pies-so-easy-not-much-hassle-286704

Broccoli Quiche

dsc_0357

This particular experience can be summed up by “cooking isn’t exactly rocket science”. While this particular quiche might be on the sweet side on account of having 24x more sugar than it ought in the crust, it still turned out rather tasty, if a little sweet.

The other thing I learned is that optimal quiche probably involves getting an eggy topping over the entire thing. Which is I’m sure is easier to accomplish if one makes the egg mixture in a liquid measuring cup or uses a measuring cup to transfer the mixture from the bowl to the in progress quiche instead of attempting to pour out of a bowl. This allows for greater control over where the stuff lands and thus the ability to sogify all of the cheese instead of just the part in the middle.

Recipe source: http://allrecipes.com/recipe/24148/easy-broccoli-quiche/

  1. Preheat oven to 350 degrees F (175 degrees C).
  2. Over medium-low heat melt butter in a large saucepan. Add onions, garlic and broccoli. Cook slowly, stirring occasionally until the vegetables are soft. Spoon vegetables into crust and sprinkle with cheese.
  3. Combine eggs and milk. Season with salt and pepper. Stir in melted butter. Pour egg mixture over vegetables and cheese.
  4. Bake in preheated oven for 30 to 50 minutes, or until center has set.


I think the recipe is perfect as is, but I feel like I should mention the places where I deviated from the recipe

  • I left out the onion because it didn’t make it onto my grocery list
  • I added an extra 1/2 cup mozzarella to make up for it slash because what else am I going to do with it
  • I made my own pie crust, which included 1/4c sugar instead of 1/2 tsp because apparently I fail at reading recipes

Mango avocado spring rolls with peanut sauce

This recipe is way more involved – you have to chop up the fruits (or vegetables, whatever they are) and then individually fill and wrap each of the spring rolls. Let’s just say and mango was a pain to slice because I was trying to get nice strips and avoid the pit, and the avocados don’t slice well because the “strips” are by nature curved.

The jury is still out regarding what I think of the finished spring rolls. They’re fun, so I’ll probably make something of the kind again some day when I don’t mind spending the entire day cooking, but I don’t know if I’ll do it exactly as I did here. Maybe just avocado, mango and cilantro without the other uninteresting stuff. Or maybe I’ll add something else, but I’m not sure what yet. The peanut sauce is definitely tasty, but it’s peanut sauce, so no surprise there.

Spring rolls and peanut sauce

Also, they clearly don’t photograph well. Right after I took the picture, I unstuck them from each other and moved them to baking pans with lids to stick them in the fridge. And then I made the sauce more runny so it could be a sauce instead of a spread. Though honestly even if it is a decent consistency for dipping, using it as a spread is probably better because then you don’t have to worry about the contents of your spring roll escaping. Or at least not as much.

One thing to keep in mind when making spring rolls (and other things) is trying to evenly distribute the ingredients amongst them without having to lay out all the wrappers on the counter and divide the toppings evenly (I think I may have wound up with more spring rolls than I was supposed to).

The spring roll recipe came out of 1,000 Vegan Recipes, so I’m not going to share it because I’m not sure of the legalities of posting such things online. But honestly, to some extent, spring roll recipes are all the same (minus the exact fillings and what you need to do to them before starting work on the actual spring rolls), and the link that the peanut sauce came from has a similar recipe that you could adapt if you felt so inclined. The peanut sauce was originally supposed to be the recipe here: http://minimalistbaker.com/rainbow-spring-rolls-with-ginger-peanut-sauce/, but I may have made enough changes that I should call it my own creation, inspired by minimalistbaker. (I ran out of soy sauce and failed to realize that chili garlic sauce isn’t chili paste. I noticed the lack of garlic as I was making it; I didn’t notice the sauce vs paste until just now. In hind sight, it’s probably supposed to be sriracha).

  • 1/2 cup peanut butter
  • 1 Tbsp soy sauce
  • a dash Worcestershire sauce
  • 1 Tbsp lime juice
  • 1/2 tsp chili paste
  • dash garlic powder
  • dash ginger powder
  • warm water to thin

Combine all the ingredients except the water. Add water a little at a time until you achieve a reasonable consistency.

Sweet and sour seitan

This is another simple but tasty main dish – again, fry up some protein, pour on a marinade, and let the marinade appear to disappear. For those of you not familiar with seitan, it’s a wheat-based meat substitute that sometimes goes by the name of mock duck (which might give you an idea of its texture).

Sweet and sour seitan

The original recipe can be found here: http://allrecipes.com/Recipe/Sweet-and-Sour-Seitan/Detail.aspx. The biggest change I made to this one was that I left out the bell pepper because it failed to make it onto my grocery list. And also, I mixed the sauce together and then added it to the pan rather than adding the various ingredients to the pan directly. It’s hard to tell from the recipe whether the juice from the can of pineapple should contribute to the 1 c of pineapple juice or if it should (all) stay in the can until you’re ready to add the pineapple. I opted for the former interpretation, and I think it turned out fine. Next time, I might try using pineapple tidbits instead of pineapple chunks (smaller pieces, but not pulverized)

I didn’t really see the sauce thicken, which I’m inclined to blame on impatience and/or using too small of a frying pan (it was just barely big enough for the onion and seitan, so I transferred it to a bowl to add the pineapple).

  • 2 teaspoons canola oil

  • 1 pound chicken style seitan

  • 2 cloves garlic, minced

  • 1 large bell pepper, cut in strips

  • 1 large onion, chopped

  • 1 (20 ounce) can pineapple chunks with juice

  • 1 cup pineapple juice

  • 1/3 cup brown sugar

  • 1/4 cup cider vinegar

  • 2 1/2 tablespoons soy sauce

  • 2 tablespoons cornstarch

Directions
  1. Heat the oil in a large skillet over medium heat. Add the chicken style seitan, and cook until browned, stirring occasionally. Add the bell pepper, onion, and garlic. Cook and stir until tender, but still crisp.
  2. Stir in the pineapple juice, brown sugar, vinegar, soy sauce and cornstarch. Reduce heat to low; cook and stir until thickened. Mix in the pineapple chunks just before serving.

Scarborough Risotto

This is a new feature that I’m tentatively calling Noms for Songs. The gist is that I’m coming up with food or drink for various songs. Some of these songs may be fairly obscure, but I figured I should kick it off with something better known. I chose Simon and Garfunkel’s Scarborough Fair. If you’re not familiar with the song, you can listen to it here.

The line from the refrain “parsley, sage, rosemary, and thyme” is what caught my attention for this song. I decided a risotto would be a nice, simple way to feature that collection of herbs.

Scarborough risotto with maple glazed tofu

This is a fairly basic risotto recipe – make a plain risotto and then add whatever flavorings catch your fancy. I think the quantity and/or balance of the seasonings in the recipe below needs adjusting. Next time I might start with 1 tsp of sage and 2 tsp of the other three primary seasonings, since 1 tbsp of each turned out to be overpowering.

Some of the measurements are approximate. The 1 c onion was actually whatever I happened to have left over from a previous recipe. The 1/3 c of white wine was 1/2 c filled mostly full but empty enough that you had a decent chance of not getting any on the floor as you tried to move it to the pot.

1 c onion
2 tbsp olive oil
1 1/2 c rice
1/3 c white wine
6 c vegetable broth
1 tbsp parsley
1 tbsp sage
1 tbsp rosemary
1 tbsp thyme
1 tsp salt

1. Heat broth large saucepan over medium heat.

2. Heat olive oil in large saucepan over medium heat. Add onion and saute until tender. Add rice. Stir

3. Add wine and stir until evaporated, about 30 seconds. Add 1 1/2 cups hot broth; simmer until absorbed, stirring frequently. Add remaining broth 1/2 cup at a time, allowing broth to be absorbed before adding more and stirring frequently until rice is creamy and tender, about 35 minutes.

4. Meanwhile, mix the seasonings together.

5. Once the last batch of broth is absorbed, remove from heat and stir in the seasonings.

Maple glazed tofu

This is a really simple and tasty main dish – mix up a marinade, fry up some tofu, mix them both together, wait for the marinade to magically, and you have a nice maple-y protein that you can pair with some kind of side dish (or it probably works well on a salad, though I haven’t tried that)
Maple glazed tofu
The original recipe can be found here: http://allrecipes.com/Recipe/Maple-Glazed-Tofu/Detail.aspx. For once, I used it as is (regarding the optional ingredients, I included the soy sauce but not the sesame seeds). Unless you count the fact that I used half a block of tofu because I’m pretty sure the whole block was either 14 or 16 oz. On a related note, I used tofu that I had frozen, and it had a really spongy texture that I think added to the dish.

  • 1/2 cup maple syrup

  • 1/2 cup pineapple juice

  • 1 teaspoon soy sauce (optional)

  • 2 tablespoons brown mustard

  • 1 tablespoon olive oil

  • 1 (8 ounce) container firm tofu, drained and cubed

  • 1 teaspoon sesame seeds(optional)

Directions
  1. Whisk together maple syrup, pineapple juice, soy sauce, and mustard in a small bowl. Set aside.
  2. Heat olive oil in a large skillet over medium-high heat and stir in the tofu. Cook and stir until the tofu is evenly browned. Stir in syrup mixture and continue to cook until the glaze has reduced. Top with sesame seeds.